

- Zoho CRM (default)
- Zoho Desk
- Zoho Mail
Zoho CRM
Supported Actions
This connector supports:- Read Actions, including full historic backfill and incremental read.
- Write Actions.
- Proxy Actions, using the base URL
https://www.zohoapis.com. - Subscribe Actions.
Supported Objects
| Object | Read | Write | Subscribe |
|---|---|---|---|
| Leads | |||
| Accounts | |||
| Contacts | |||
| Deals | |||
| Campaigns | |||
| Tasks | |||
| Cases | |||
| Events | |||
| Meetings | |||
| Calls | |||
| Solutions | |||
| Products | |||
| Vendors | |||
| Price Books | |||
| Quotes | |||
| Sales Orders | |||
| Purchase Orders | |||
| Invoices | |||
| Appointments | |||
| Appointments Rescheduled History | |||
| Services | |||
| Custom | |||
| Users |
Example Integration
For an example manifest file of a Zoho CRM integration, visit our samples repo on GitHub.Zoho Desk
Supported Actions
This connector supports:- Read Actions, including full historic backfill and incremental read for most objects.
- Write Actions.
Supported Objects
The Zoho connector allows you to read from and write to these objects:- organizations
- agents
- profiles
- roles
- departments
- channels
- tickets
- contacts
- accounts
- tasks
- products
- helpCenters
- users
- labels
- groups
- articles
- articleFeedbacks
- kbRootCategories
- contracts
- ticketTemplates
- calls
- events
- organizationModules
- languages
- countries
- timeZones
- businessHours
- domains
- holidayList
- im/channels
- im/sessions
Example Integration
For an example manifest file of a Zoho Desk integration, visit our samples repo on GitHub.Zoho Mail
To use Zoho Mail, addmodule: mail to your integration definition in amp.yaml:
Supported Actions
This connector supports:- Read Actions, including full historic backfill. Please note that incremental read is not supported, a full read of the Zoho Mail instance will be done for each scheduled read.
- Write Actions.
- Subscribe Actions. Please note that special set up is needed for Zoho Mail: Zoho Mail has no API to create or manage webhook subscriptions, so your customer configures an outgoing webhook by hand in the Zoho Mail console, and Ampersand verifies and processes the delivered events.
Supported Objects
Subscribe events
Ampersand supports two of Zoho Mail’s outgoing-webhook entities, delivered to the same endpoint:- messages: fires when a new email is received. When configuring the webhook, your customer can optionally narrow it with conditions (e.g. sender or subject filters) or tags; a webhook also fires when a matching tag is manually applied to an email. All mail deliveries surface as
createEvent— Zoho Mail does not send webhooks for message updates or deletions. - tasks: fires on task activity in groups your customer owns or moderates. Supports
createEvent,updateEvent, anddeleteEvent, mapped from the task action that triggered the webhook.
Set up Subscribe Actions for Zoho Mail
Zoho Mail has no API for creating webhook subscriptions, so unlike Zoho CRM, Ampersand cannot register the webhook on your customer’s behalf. Instead:-
Define the subscribe action in your
amp.yamland deploy it with the amp CLI: -
Construct a webhook URL for your customer in this format:
- Share the Zoho customer guide with your customer along with the webhook URL from Step 2. Your customer will create an outgoing webhook in the Zoho Mail console (Settings > Developer Space > Webhooks > Outgoing Webhooks > Create new configuration) that delivers events to this URL. See the Zoho Mail webhook documentation for details.
Example Integration
For an example manifest file of a Zoho Mail integration, visit our samples repo on GitHub.Before You Get Started
To connect Zoho with Ampersand, you will need an account in an appropriate Zoho product: Once your account is created, you’ll need to configure an app in Zoho and obtain the following credentials from your app:- Client ID
- Client Secret
- Scopes
Create a Zoho Account
Go to the particular Zoho product sign-up page and create an account:Creating a Zoho App
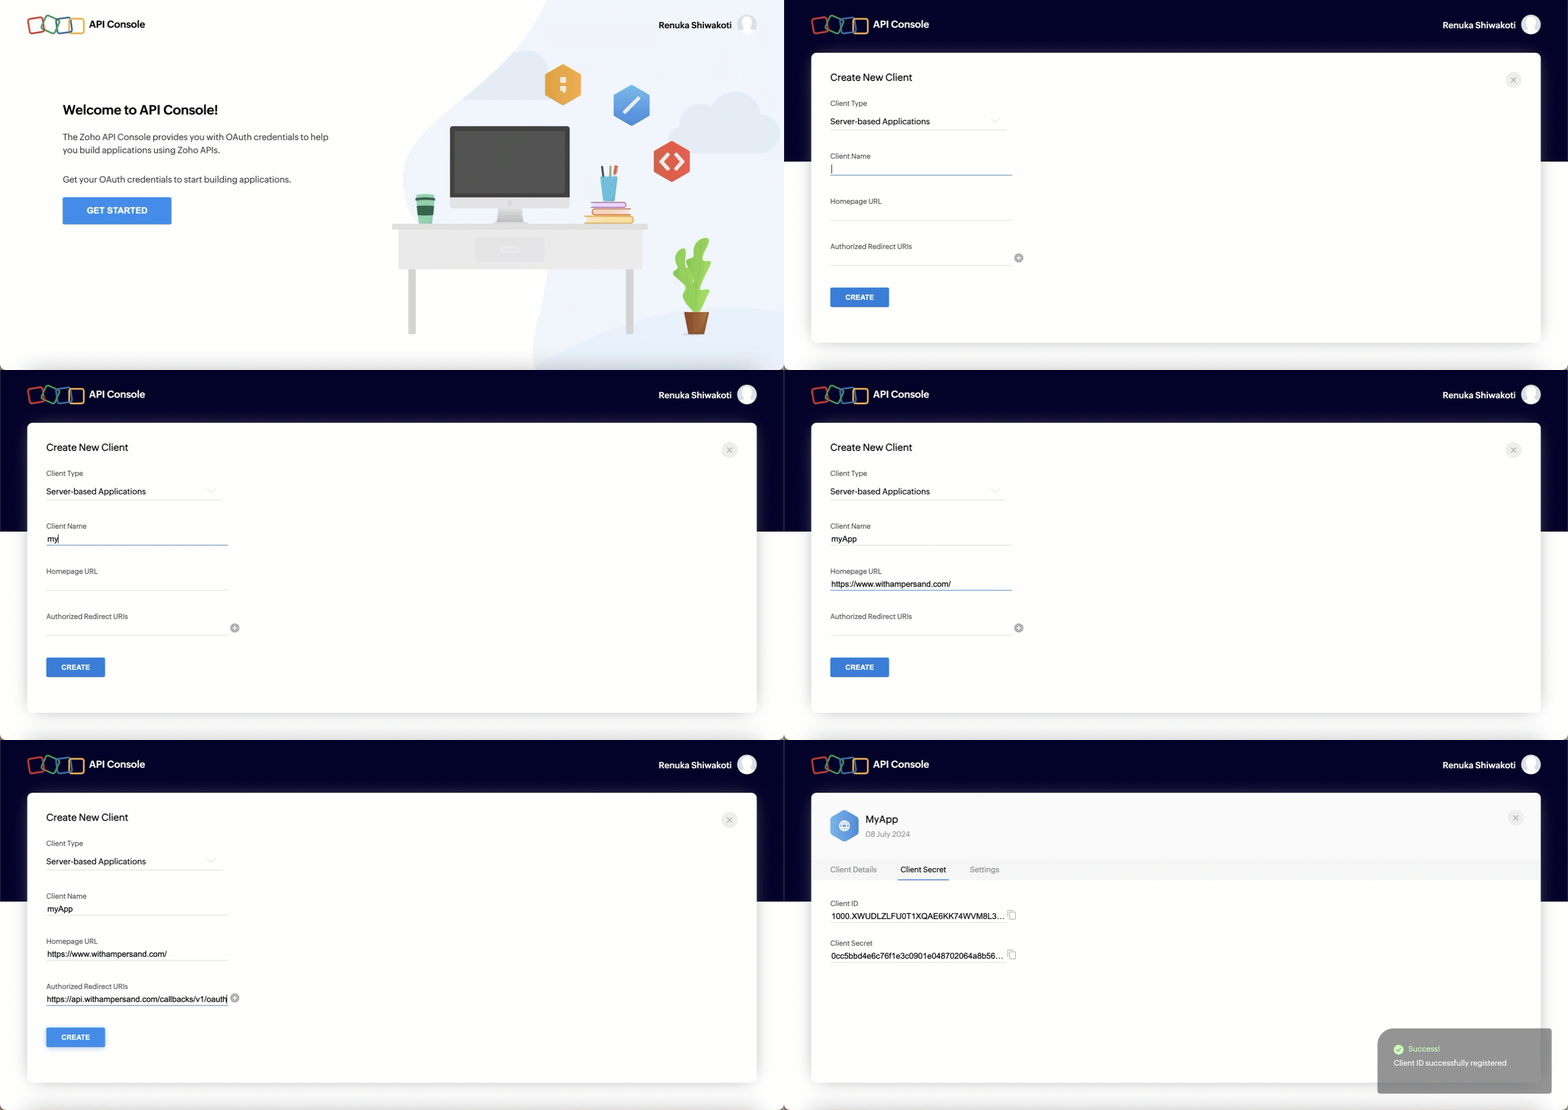
Follow the steps below to create a Zoho app and add the Ampersand redirect URL:- Log in to the Zoho API Console Account using your Zoho account.
- Click Get Started to create your first app. If you have already created an application, click Add Client to create a new app.
- Select Server-based Applications.
- Enter the following details:
- Client Name: Name of the client app
- Homepage URL: The home page URL of your app
- Authorized Redirect URIs: The Ampersand redirect URL:
https://api.withampersand.com/callbacks/v1/oauth
- Click Create.
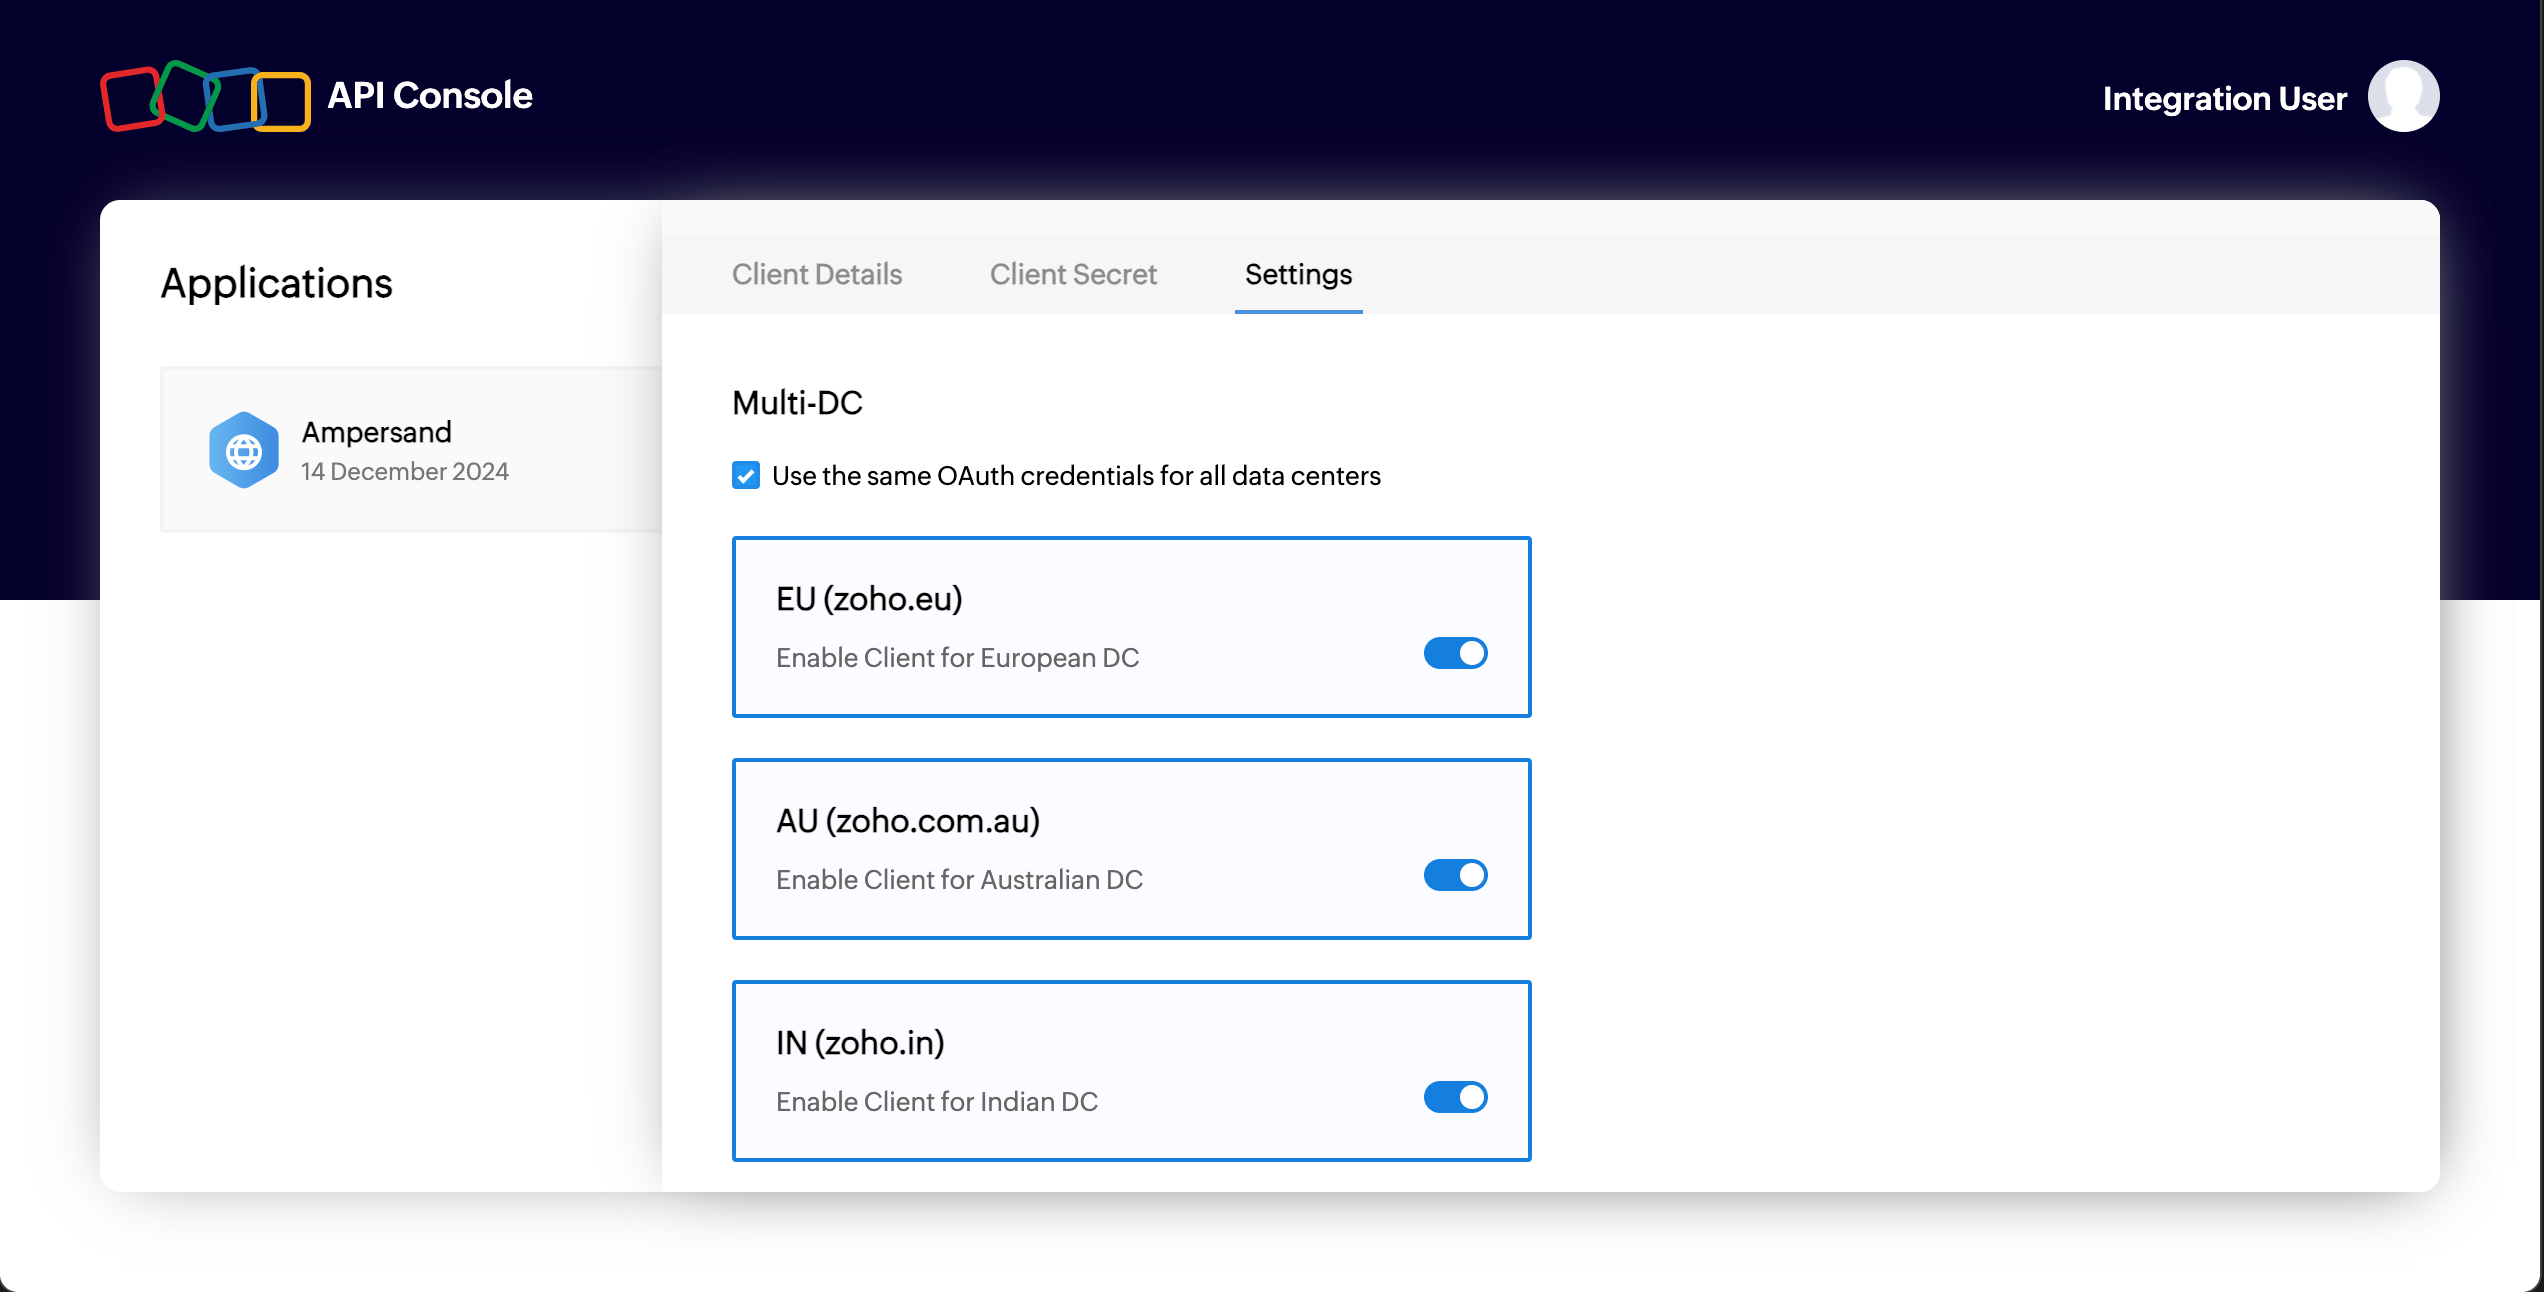
- Select the checkbox “Use the same OAuth credentials for all data centers” in the settings tab. Also toggle all regions where you expect to have customers.
Add Your Zoho App Info to Ampersand
- Log in to your Ampersand Dashboard.
- Select the project where you want to create a Zoho integration.

- Select Provider apps.
- Select Zoho from the Provider list.
- Enter the previously obtained Client ID in the Client ID field and the Client Secret in the Client Secret field.
- In the Scopes field, enter the list of desired scopes for your integration. We recommend the following scopes. If you want more granular scopes, please refer to the Zoho documentation for syntax.
ZohoMail.accounts.READ is sufficient): Ampersand uses it after authentication to resolve your customer’s Zoho Mail account ID, which account-scoped objects (messages, accounts/folders, accounts/labels) depend on. You can drop the scopes for object families you don’t use.
- Click Save changes.
Customer Guide
The Zoho Customer Guide can be shared with your customers to help them successfully use your integration.List on Zoho Marketplace
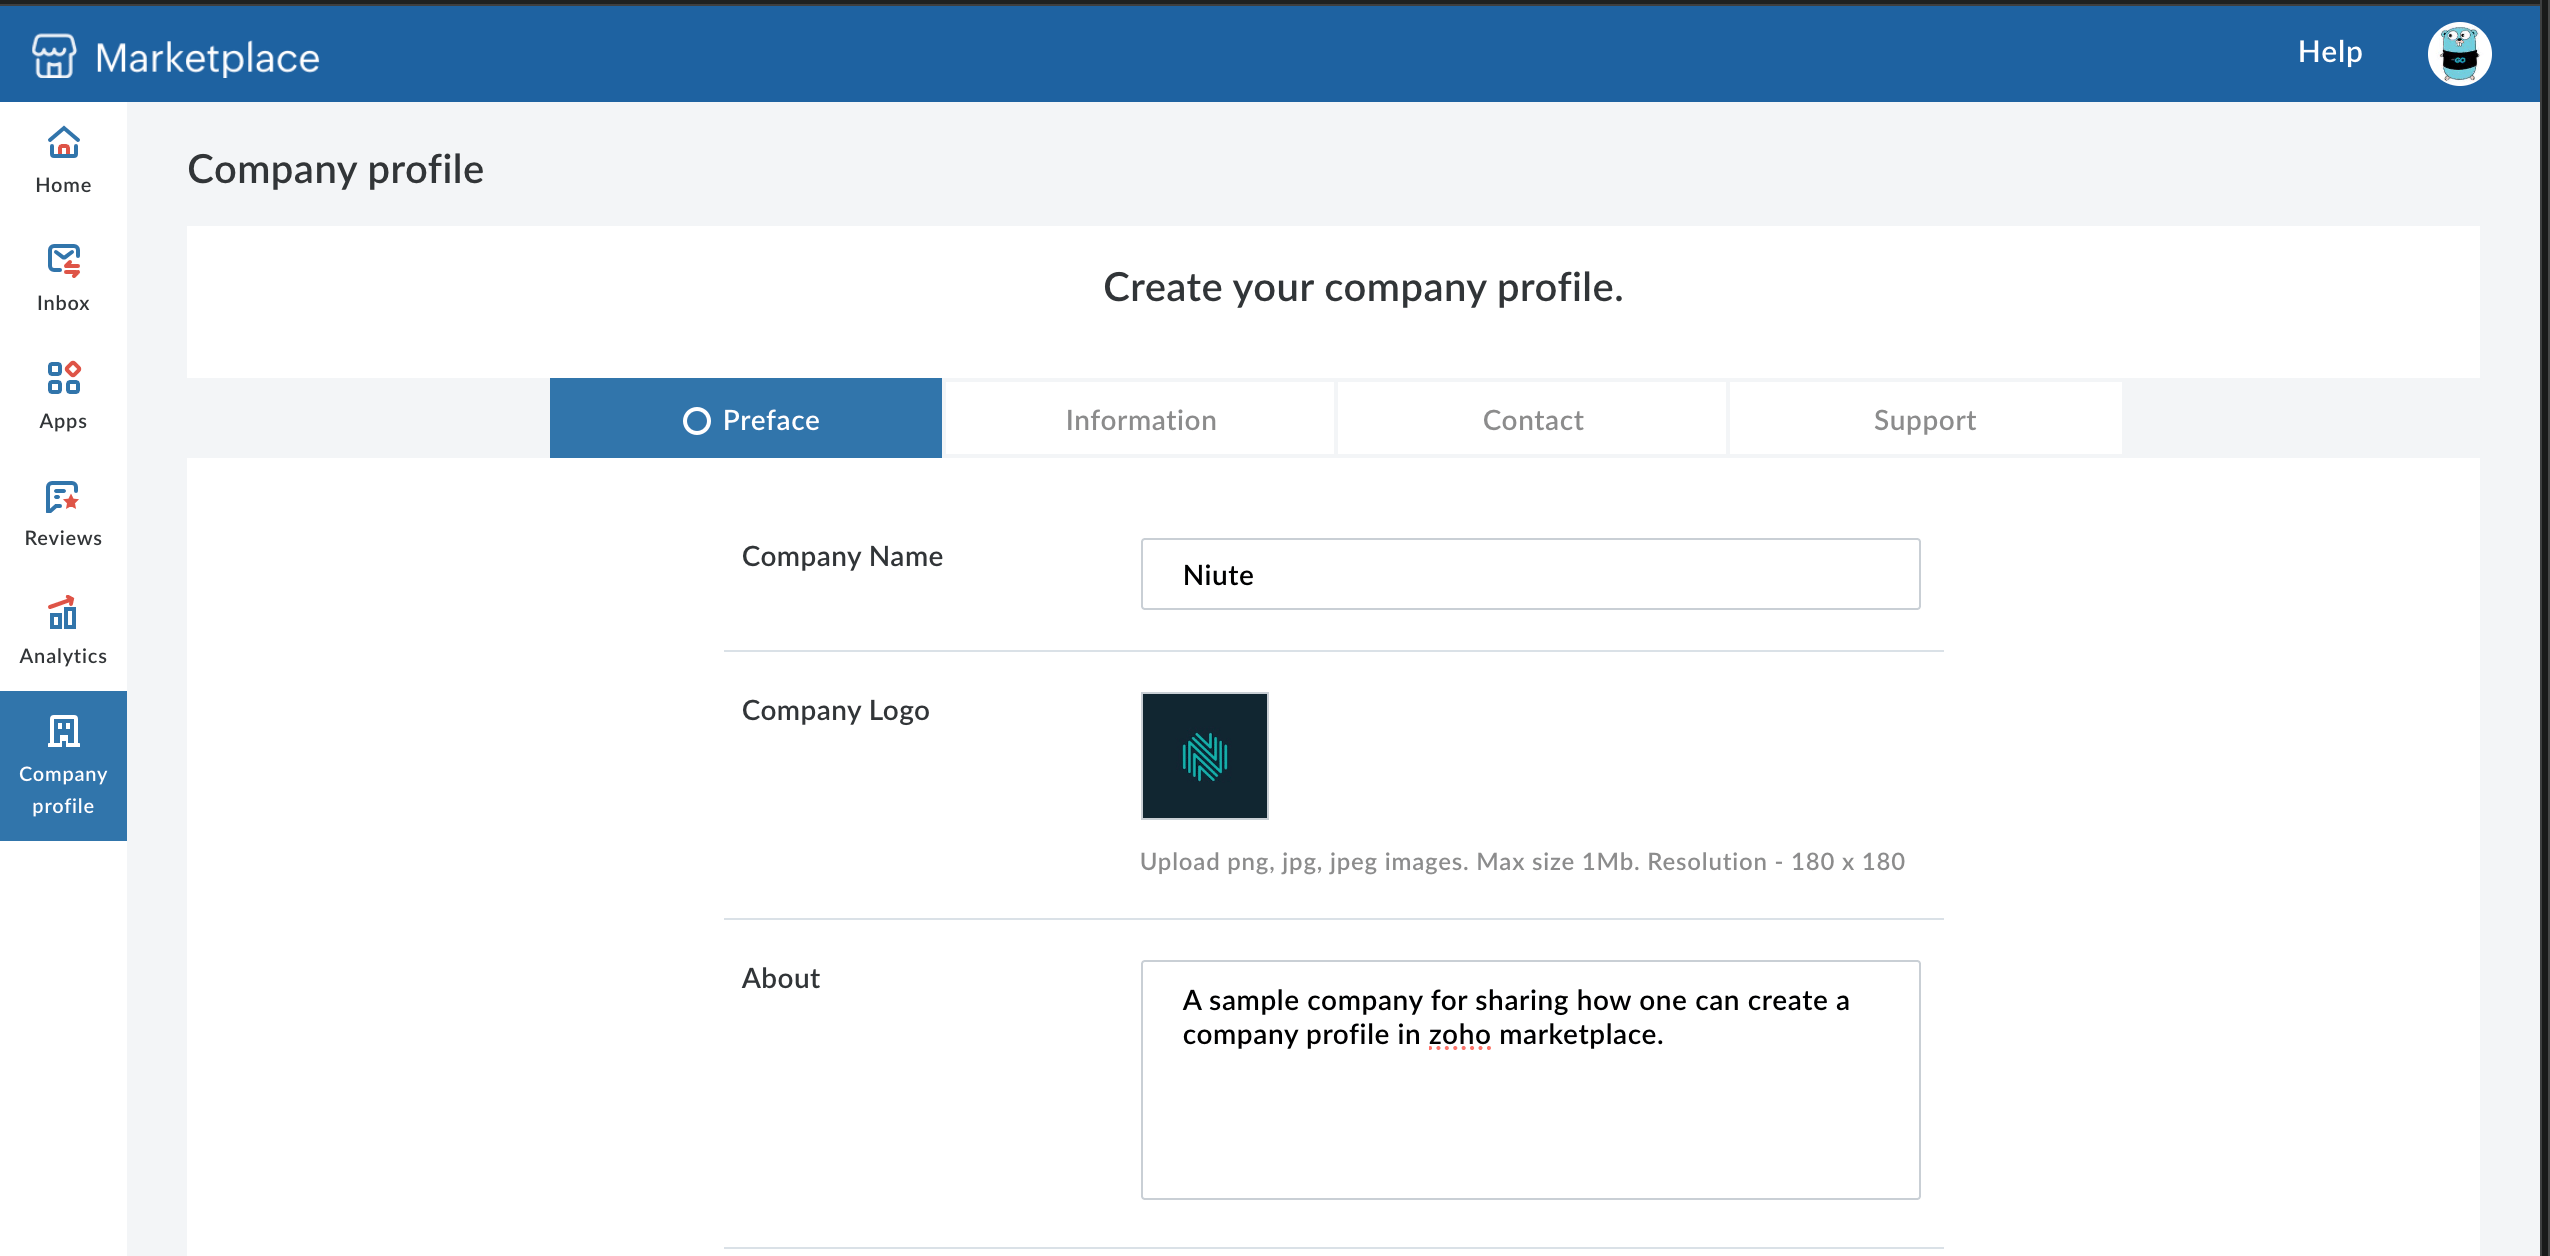
The final step, which is optional, is to list your application on the Zoho Marketplace. Follow the steps below to list your application:- Sign up and create a company profile on the Zoho Marketplace.
- Click on the profile icon on the home page and select Partner Console.
- Select Company Profile on the left panel.
- Provide your company details. Note that these are your own company’s details, not Ampersand’s.
- After successful registration, go to Apps on the left sidebar and click Submit App.
- Complete the process by adding your app’s details and submitting it.